
Residential Lift Elevator Madison Heights: Space & Structural Requirements for Retrofits
September 24, 2025
Top Safety Concerns for Home Wheelchair Ramps: What You Need to Know
October 15, 2025
When families start researching What is the Average Cost of Installing a Wheelchair Ramp at Home? They’re often met with a swirl of numbers, materials, and code terms that feel confusing. This guide explains typical price ranges, the factors that influence costs, and smart ways to plan your budget—without compromising safety or long-term value. For readers seeking expert assistance, the phrase ‘What Is the Average Cost of Installing a Wheelchair Ramp at Home?‘ in this article links to CAPS Remodeling, your trusted accessibility remodeling expert.
Quick takeaway: typical cost ranges you’ll see
If you just need the headline numbers before diving deeper:
- Portable ramps: $100–$800 each (short lengths, limited use)
- Threshold ramps: $60–$300 per doorway
- Modular aluminum ramps: $2,000–$8,000+, depending on length, platforms, and handrails
- Permanent wood ramps: $1,500–$6,000+ based on lumber costs, layout, and finishes
- Concrete ramps: $3,000–$12,000+ for poured-in-place with footings and masonry rails
- Custom steel ramps: $4,000–$15,000+ for fabrication and coatings
These are broad ranges. Your exact price depends on rise, run, design complexity, site work, local codes, and finish details.
Why does the “average cost” vary so much
Two homes can have the same front door height and still require very different budgets. The major cost drivers include:
- Total rise and required length: Accessibility guidelines often recommend a slope of approximately 1:12 (1 inch of rise per 12 inches of run). A taller rise means a longer ramp, requiring more materials and labor.
- Material choice: Wood, aluminum, concrete, and steel have very different price points and maintenance profiles.
- Platforms and turns: Straight runs are generally less expensive. Add landing platforms, switchbacks, or L-turns, and you add posts, footings, and handrails.
- Site prep: Level ground is easier to work with. Sloped yards, landscaping obstacles, or utility lines add time and cost.
- Handrails and guards: Code-compliant rail systems are non-negotiable for safety and can be a noticeable part of your budget. Ensuring these safety standards are met will provide you with peace of mind and a secure environment for the wheelchair user.
- Permits and inspections: Some municipalities require building permits for permanent ramps; fees and lead times vary. Being aware of these requirements and preparing for them in advance will ensure a smooth and hassle-free installation process.
- Finishes and extras: Anti-slip treads, snow-melt options, paint/stain, lighting, and weatherproof hardware can add to the total. These finishing touches not only enhance the ramp’s functionality but also contribute to its overall safety and aesthetics.
Cost by ramp type and when each makes sense
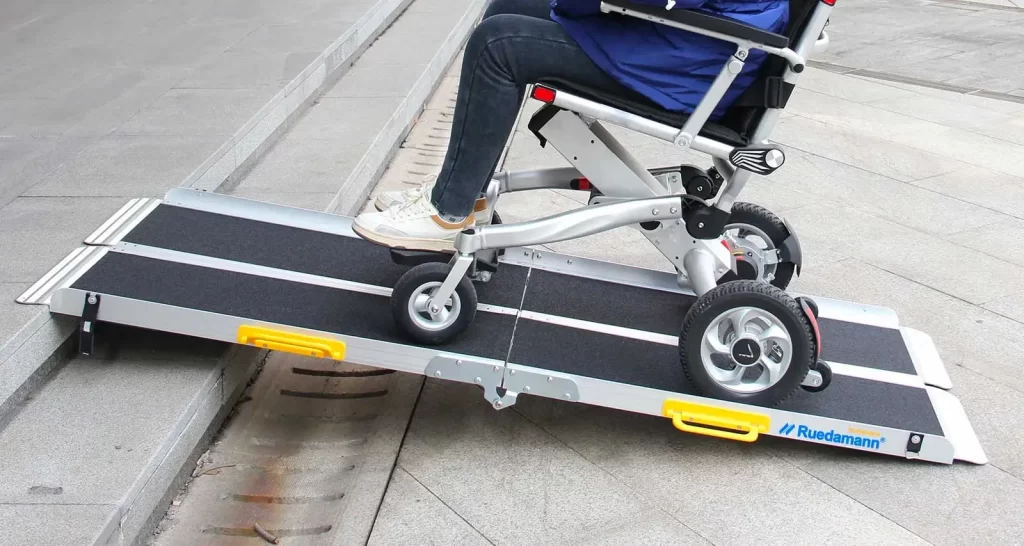
Portable and threshold ramps
- Cost range: $60–$800
- Best for: Small rises (1–6 inches), temporary needs, or door lips.
- Notes: Great as a stopgap but not a substitute for a fully code-compliant, permanent solution. Portable units may lack integrated handrails and aren’t ideal for regular outdoor exposure.
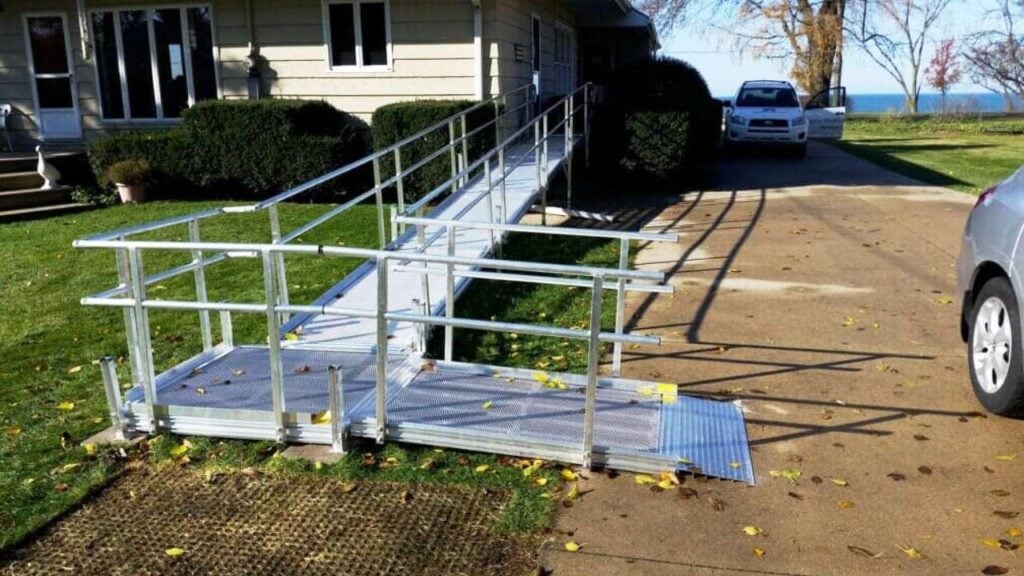
Modular aluminum ramps
- Cost range: $2,000–$8,000+
- Best suited for: fast installation, low maintenance, and flexibility (sections can be easily reconfigured).
- Why people choose aluminum: It won’t rot, it’s lighter than steel, and most systems come with slip-resistant decking. For many homeowners, this is the sweet spot between durability and cost.
Permanent wood ramps
- Cost range: $1,500–$6,000+
- Best for: Custom fits and a more traditional residential look.
- Considerations: Wood is often cost-effective in materials but needs regular maintenance (sealing/staining). In freeze-thaw climates, plan for traction upgrades.
Concrete ramps
- Cost range: $3,000–$12,000+
- Best suited for: Long-term, permanent installations with minimal upkeep.
- Considerations: Requires excavation, forms, and cure time. Add broom finishes or embedded anti-slip aggregates. Repairing later is more involved than wood or aluminum.
Custom steel ramps
- Cost range: $4,000–$15,000+
- Best for: High-durability, commercial-style applications, or unique architectural needs.
- Considerations: Fabrication, powder coating, and anchoring all contribute to the cost. Maintenance is lower than that of wood, but higher than that of aluminum in corrosive environments.
How to estimate ramp length—and why this matters to your budget
A simple way to frame your budget is to estimate the total run needed. Using a 1:12 slope:
- 24 inches of rise ≈ , 24 feet of ramp
- 30 inches of rise ≈ , 30 feet of ramp
- 36 inches of rise ≈ , 36 feet of ramp
If you need landings (for resting or turning), add at least 5 ft x 5 ft for a 90-degree turn and more for a full switchback. Each added platform brings posts, bracing, and rail components—so your price scales with complexity. This is why one home’s “average” is another’s outlier.
Line-item cost breakdown (what you’re actually paying for)
- Design & evaluation (5–10%): Site assessment, code review, and layout.
- Materials (40–65%): Lumber, aluminum sections, concrete, fasteners, handrails, and guards.
- Labor (25–40%): Demolition (if needed), footings, assembly, anchoring, finishing.
- Permits & inspections (1–5%): Varies by municipality.
- Finishes & accessories (2–10%): Anti-slip treads, paint/stain, lighting, edge protection.
- Contingency (5–10%): Hidden obstacles (buried roots, utilities, poor soil) or last-minute changes.
Key benefits of a professionally installed ramp (at a glance)
| Benefit | Why it matters | What it looks like in practice |
| Safer access | Reduced fall risk with proper slope, landings, and rails | Confident entry/exit for wheelchairs, walkers, and caregivers |
| Code alignment | Meets local building rules and best practices | Smoother permitting, fewer surprises during inspection |
| Durability | Materials and fasteners suited to the climate | Less maintenance, longer lifespan |
| Resale sensitivity | Thoughtful design blends with home style | Improves usability without looking “temporary” |
| Speed & support | A single team from design to install | Clear timeline, warranty, and follow-up guidance |
Average cost scenarios (so you can compare yourself)
These examples show how choices change totals. Assume standard site conditions and a typical suburban entrance.
- Small rise, straight run (wood):
- Rise: 18 inches → ~18 feet of ramp
- Layout: Single straight run with one top and one bottom landing
- Estimated total: $1,800–$3,200 (materials + labor)
- Why it’s lower: Minimal turns, lower material count, faster build.
- Moderate rise with one turn (aluminum):
- Rise: 28 inches → ~28 feet of ramp
- Layout: L-turn with a 5×5 intermediate platform
- Estimated total: $4,000–$7,500
- Why it’s mid-range: Aluminum sections cost more per foot, but you gain low upkeep and speed.
- High rise with switchback (concrete):
- Rise: 36 inches → ~36 feet of ramp
- Layout: Two runs with a full switchback landing
- Estimated total: $7,500–$12,000+
- Why it’s higher: Excavation, forming, rail integration, and cure time.
Hidden costs homeowners often miss
- Soil conditions and frost depth: Deeper footings in cold climates add labor and concrete.
- Drainage and grading: Water management around posts and landings protects your investment.
- Door modifications, such as widening doorways, adjusting thresholds, or adding lever handles, can enhance usability and contribute to the project’s overall success.
- Lighting and power: Low-voltage lights or motion sensors boost night-time safety.
- Temporary access during construction: A plan for safe entry while the ramp is being built prevents disruption.
Permits, codes, and safety—why they affect price
While a portable ramp can be placed without permits, permanent ramps are typically part of your home’s egress system and must meet local building requirements. Expect to see standards around:
- Slope (run per inch of rise), with limits for safety
- Minimum clear width
- Landing size and levelness
- Handrail height, grip, and extensions
- Edge protection to prevent wheels from slipping off
- Surface traction for wet or icy conditions
Meeting these details might add material and labor, but they pay off in safety and peace of mind.
Choosing materials: how costs compare over time
- Wood: Lower initial cost, higher maintenance. You’ll likely need to re-seal or re-stain every 1–3 years, depending on the level of exposure.
- Aluminum: Mid-to-higher initial cost, minimal maintenance, and strong resale appeal due to its clean aesthetics.
- Concrete: Higher upfront cost, very durable, but difficult to modify later.
- Steel: Durable and strong, but factor in coatings and potential touch-ups over time.
When evaluating, What Is the Average Cost of installing a Wheelchair Ramp at Home? Look beyond just the bid. The “cheapest” option might actually cost more in terms of upkeep or accessibility compromises.
Ways to save without cutting safety
- Keep the layout simple. Every turn adds cost. A straight run with standard landings is budget-friendly.
- Right-size the ramp. If the front rise is very high, consider a side or garage entry with a smaller rise.
- Choose materials for your climate. Aluminum or concrete may be worth the premium where moisture and freeze-thaw cycles are relentless.
- Bundle improvements. If you’re planning grab bars, handrails, or door widening, doing them together can reduce mobilization and permitting overhead.
- Ask about lead times. In-stock aluminum modules can cut labor costs and speed installation.
- Plan for traction. Simple, high-grip surfaces avoid costly slips and later retrofit expenses.
DIY vs. professional installation: a candid look at cost and risk
- DIY
- Pros: Lower labor cost, schedule flexibility.
- Cons: Risk of non-compliance, mis-calculated slopes, unstable footings, and limited warranty support. Mistakes can lead to re-work that erases any savings.
- Professional
- Pros: Code-aligned design, warranty, proper anchoring, and a ramp that feels solid under daily use.
- Cons: You pay for skilled labor—and that’s usually worth it for safety-critical access.
If you’re weighing the two, remember the ramp becomes part of your home’s means of egress. A pro-installed system reduces liability and ensures the ramp performs as intended in all seasons.
Timeline and what to expect during installation
- Site visit & design: Measurements, code review, and layout options.
- Proposal: Clear scope, materials, finishes, timeline, and permit needs.
- Permitting (if required): The contractor submits drawings; timelines vary by jurisdiction.
- Build day(s): Posts and footings first, then framing/sections, then handrails and finishing touches.
- Final walkthrough: Slope check, rail spacing, landing levelness, traction, and hardware.
Aluminum modular systems can be finished quickly, while concrete requires curing time. Wood sits in the middle, depending on staining and weather windows.
Budget planning checklist (print-friendly)
- Measure the top-to-ground rise at your chosen entry
- Decide on the primary user needs (wheelchair, walker, caregiver assistance)
- Choose material based on climate and maintenance comfort.
- Sketch a straight or turning layout (prefer straight if possible)
- List extras (lighting, snow traction, stain/paint)
- Ask about permits and lead times.
- Keep a 10% contingency for surprises.
Signs your quote is realistic
- It includes the exact rise and the calculated run length.
- Landings, handrail specs, and edge protection are clearly defined.
- Materials and finishes are itemized (not just “lump sum”)
- It references permit requirements where applicable.
- It outlines a warranty for materials and workmanship.
- There’s a plan for drainage and soil conditions at posts.
When a ramp isn’t the only answer
Depending on your entry height and interior layout, other accessibility solutions might fit better:
- Platform lifts (vertical): Compact footprint for taller rises where ramp length would be excessive.
- Interior adjustments, such as a different entry door, minor grading, or a garage entrance, can shorten the required run and reduce costs.
A qualified team like CAPS Remodeling can guide you through trade-offs, helping you choose the right solution the first time.
Real-world budgeting tips from accessibility projects
- Think seasons: In snowy regions, plan for grip and snow clearance from the start; retrofits are more expensive.
- Design for caregivers: Slightly wider landings and rails with proper extensions make assisting safer and easier.
- Future-proofing: If your needs may increase, choose modular designs or those that allow for extensions later.
- Aesthetics matter: Matching rails, skirting, or coordinated stain/paint helps the ramp feel integrated—not temporary.
Final thoughts: what “average cost” should mean to you
Asking What is the Average Cost of Installing a Wheelchair Ramp at Home? is a smart first step. But your best number is the one tied to your rise, layout, and material choices—paired with a design that feels safe, looks good, and withstands your climate. A clear, itemized proposal turns uncertainty into a plan you can trust.
FAQs
1) What’s the most budget-friendly permanent ramp material?
Wood typically has the lowest upfront cost for permanent ramps, especially for short, straight runs. Just account for maintenance every few years.
2) How long does installation usually take?
Aluminum modular systems can be completed fast once on site. Wood ramps may take a bit longer due to the framing and finishing process. Concrete takes the longest because of the cure time.
3) Do I need a permit for a home ramp?
If it’s permanent and part of your home’s exit route, a permit is often required. Rules vary, so plan for permit fees and inspections in your budget.
4) How steep can my ramp be?
Many guidelines recommend a 1:12 slope (approximately 4.8°). Shorter, steeper ramps can feel unsafe—especially in wet or icy conditions—and may not pass inspection.
5) Can I reuse or move a ramp later?
Modular aluminum systems are designed to be reconfigured or relocated. Wood and concrete are typically fixed in place and are harder to move.
Introducing Kevin Olrich, Owner of CAPS Remodeling. As a trusted expert in the field of barrier free remodeling Kevin brings a compassionate approach to create safer, more comfortable, and independent living conditions for the elderly and disabled throughout the State of Michigan. His leadership and experience is at the core of how CAPS provides the best solutions to meet the unique needs of our customers and medical professionals.


