
Madison Heights: Your Guide to Handicap Accessible Bathrooms
December 30, 2025
Elevators for House Rentals Michigan: Accessibility, Insurance & ROI
January 9, 2026
If you’re searching for how to keep a handicap ramp from freezing, you’re focused on one thing: safe, steady access in winter. Ice forms fast, even in light snow or brief thaws, and a slick ramp can sideline daily routines. Below is a practical, skimmable guide you can use right now—follow the quick checks, then put the 10 steps into action. We’ll cover wood, aluminum, and concrete ramps, plus accessories, safe de-icers, and long-term upgrades that withstand harsh weather.
(P.S. For a deeper maintenance checklist, see our winter care page: how to keep handicap ramp from freezing.)
Quick checks before the storm
- Angle & drainage: Water should shed quickly. Standing water = ice later.
- Surface texture: If it’s smooth, you’ll need added traction.
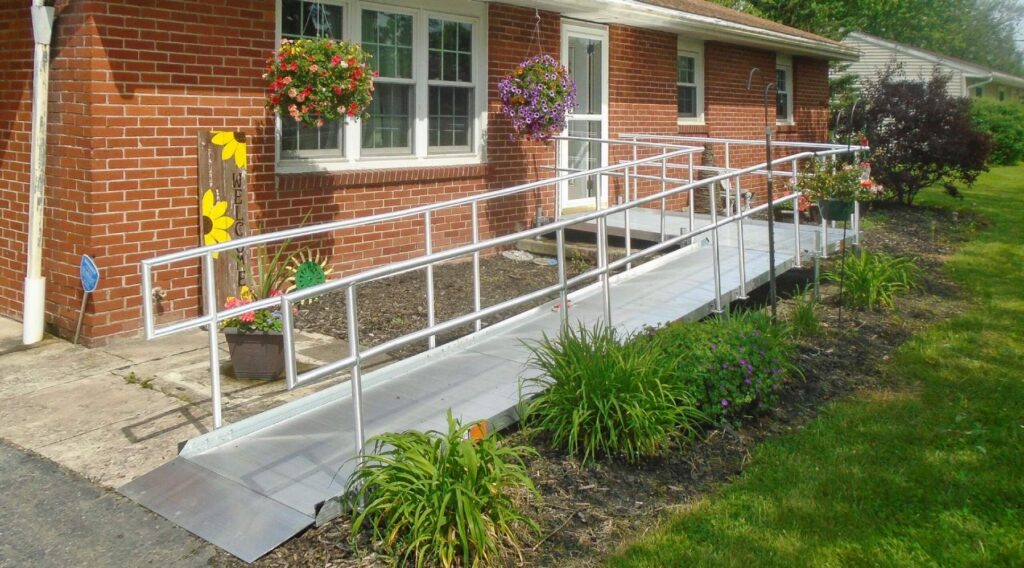
- Handholds: Handrails on both sides, consistent height, and continuous.
- Entry and landing zones: Melting snow from a roof or gutter can refreeze across the ramp.
- Clear edges: Packed snow along the sides creeps onto the deck and freezes overnight.
The 10-step winter plan
1) Clear snow early—don’t let it bond
Fresh snow is easy to remove; old snow compacts and bonds to the surface. Use a plastic snow shovel or a soft-edge pusher to avoid gouging wood or scratching aluminum. Work with the slope, pushing downhill to reduce strain. After clearing, sweep up any remaining snow dust so it doesn’t melt and refreeze.
Pro tip: Keep a small snow broom or floor squeegee at the top landing for quick touch-ups when flurries start. Two minutes is better than 20 minutes later.
2) Add fast traction with outdoor-rated mats
Rubber or recycled-tire traction mats give quick grip and help funnel meltwater. Choose perforated or grooved designs to allow water to pass through. Anchor mats so edges don’t curl or become trip points. On wood ramps, avoid trapping moisture—leave slight gaps between mat strips to ventilate the deck.
Where to place:
- Top landing (where boots track in the most snow)
- Mid-ramp sections with shade (freeze-prone)
- Bottom landing, especially if adjacent to a driveway snowbank
3) Choose a de-icer that matches your ramp material
There’s no one “magic” de-icer; choose one for the material and temperature range.
- Aluminum ramps: Use calcium magnesium acetate (CMA) or potassium acetate when available. Avoid chloride salts that can corrode metal over time.
- Wood ramps: CMA is gentler on wood fibers. Sand can add traction, but sweep it up later so it doesn’t trap moisture.
- Concrete ramps: Calcium chloride melts at lower temperatures than rock salt (sodium chloride) and is less harsh than magnesium chloride at very low temperatures. Avoid using de-icers on new concrete (first winter) to protect the surface.
Always: Apply sparingly, then flush any residue during thawing to protect nearby landscaping and hardware.
4) Improve drainage so water doesn’t linger
Ice builds where water pauses. Look for subtle dips, raised screw heads, or clogged gaps.
- Wood: Ensure deck board gaps are clear. If the surface is solid plywood, add narrow kerf grooves or perforated traction strips to direct runoff.
- Aluminum: Keep tread perforations open—packed snow can block them.
- Concrete: Check for low spots; a thin squeegee pass after storms moves water off the surface before refreeze.
Gutters & downspouts: Re-aim roof discharge away from the ramp. A single downspout can glaze a ramp from top to bottom during freeze-thaw cycles.
5) Upgrade traction with permanent grip
Short-term mats are great, but fixed traction performs in the worst weeks.
- Adhesive mineral-grit treads: Fast, affordable, and effective on wood, aluminum, and concrete (clean and dry before application).
- Epoxy-aggregate coatings: For wood or concrete, these add a textured, durable finish. Let them cure fully before winter.
- Extruded aluminum or fiberglass grit strips: Mechanical fasteners hold up well and can be replaced one section at a time.
Layout tip: Stagger strips in a ladder pattern so wheels always meet grit—especially helpful on turns.
6) Consider heated solutions for no-shovel mornings
Electrically heated options cut ice formation at the source:
- Portable heated mats: Plug-in mats placed on key sections (landings, steep stretches). Look for GFCI-protected cords and outdoor ratings.
- In-ramp heat cables: For concrete ramps, embedded snow-melt cables deliver consistent performance. On wood or aluminum, surface-mounted systems are available but must be properly shielded and installed in accordance with code.
Energy tip: Pair heat with a thermostat or moisture sensor so the system runs only during icing conditions.
7) Add wind and drift control
Snow doesn’t only fall—it blows. Reduce accumulation on the ramp:
- Wind breaks: Lattice panels, clear poly panels, or low fences along the windward side reduce drifting.
- Canopies or awnings: A small overhead cover at the top landing keeps this critical step-off point dry. For longer ramps, modular covers create shaded but dry lanes.
Note: Ensure any structure leaves full headroom and handrail clearance for mobility devices.
8) Maintain the handrails like they’re part of the deck (because they are)
Handrails are your backup when surfaces get slick. Winter-ready rails should be:
- Continuous from start to finish, on both sides.
- Warm to the touch when possible—vinyl sleeves or composite covers reduce thermal shock compared to bare metal.
- Clear of ice: A quick pass with a microfiber towel after storms prevents glaze.
- Well-lit: Add low-glare LED rail lights for evening visibility without blinding glare on snow.
9) Create a maintenance rhythm (the 10/2/1 rule)
- 10 minutes before a storm: Place mats, plug in heated sections if used, and stage tools.
- 2 hours into a storm: Quick pass—push off accumulation before foot traffic compacts it.
- 1 hour after the storm: Final clear, spot de-ice, and squeegee melt lines.
Stick a laminated checklist near the entry so any helper or caregiver can follow the same routine.
10) Plan long-term fixes if you fight ice every week
If icing is constant, consider design changes during the off-season:
- Adjust slope: A slightly shallower run sheds water more predictably and is easier to clear.
- Segmented landings: Add mid-landings with cross-slope drainage breaks.
- Surface replacement: Swap smooth boards for textured decking, or upgrade to aluminum tread systems that drain more effectively.
- Integrated heat: Build snow-melt into the ramp or landing pads during resurfacing.
- Lighting & power: Add dedicated outdoor GFCI outlets for heated mats and a switch inside the door.
When you’re ready for design changes, CAPS Remodeling can evaluate slope, surfaces, and drainage, and suggest upgrades that match your mobility needs and winter conditions.
Material-specific playbooks
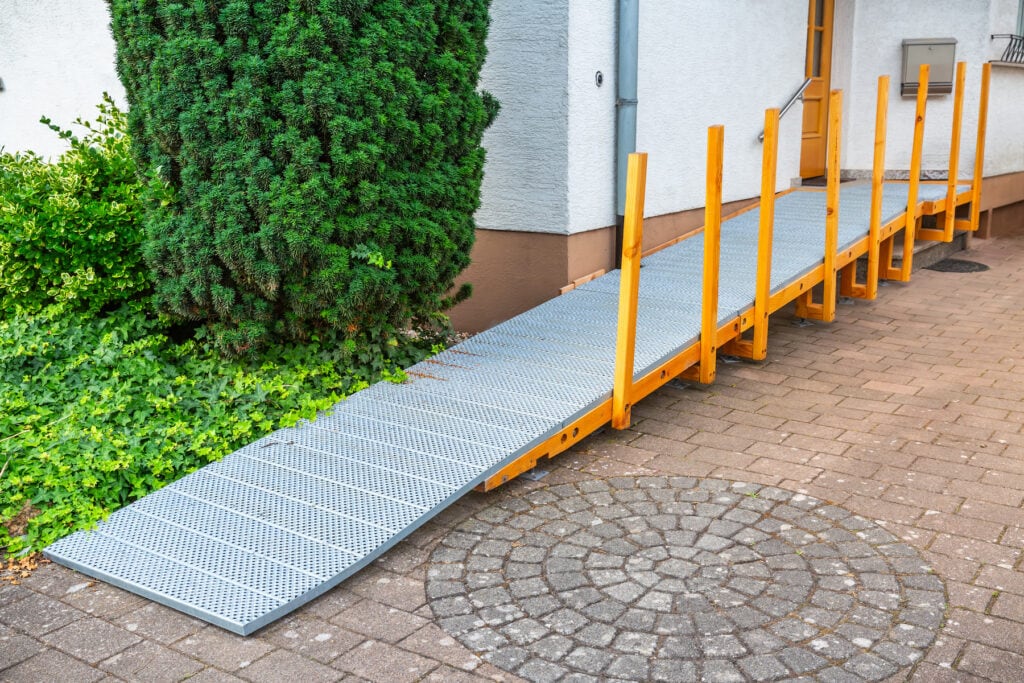
Wood ramps (cedar, PT lumber, or composites)
- Seal before winter: A breathable sealer reduces water absorption and slows freeze damage.
- Avoid metal shovels: They splinter fibers and peel coatings.
- Mind fasteners: Recess protruding screws—tiny bumps catch shovels and snag mats.
- Grit + strips: Pair epoxy-grit at high-wear zones with adhesive treads on approaches.
- Watch shade: North-facing wood stays damp longer; emphasize mats or heat here.
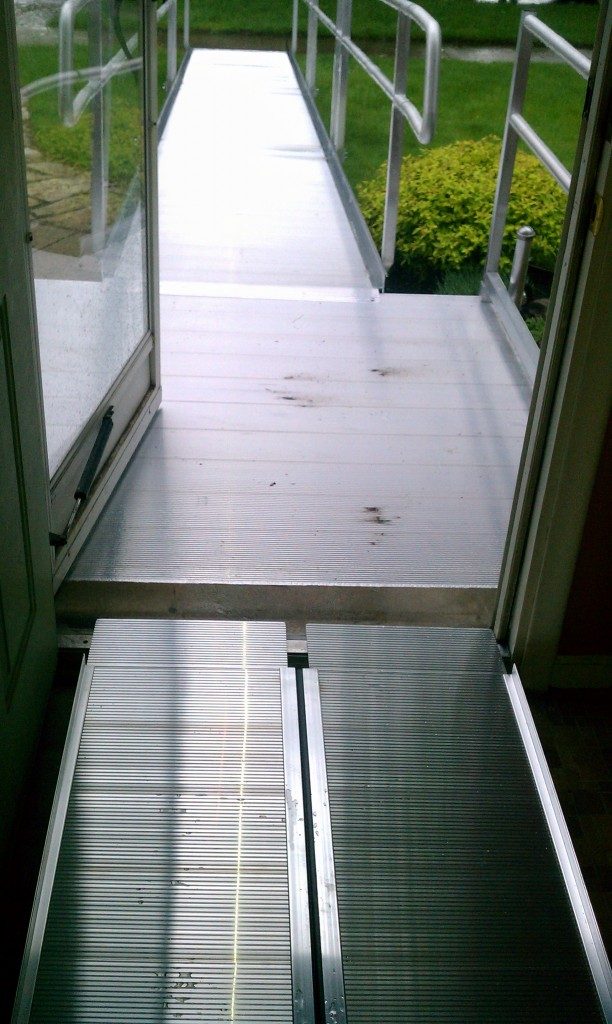
Aluminum ramps (modular systems)
- Keep perforations clear: Packed snow in the holes eliminates their drainage advantage.
- Use non-corrosive de-icers: Favor CMA; rinse periodically.
- Thermal shock: Aluminum chills quickly; heated mats on landings make a big difference.
- Bonding: Use manufacturer-approved non-slip strips; avoid adhesives that won’t stick in cold weather.
Concrete ramps (poured or precast)
- Seal joints: Water intrusion at joints can freeze and pry them open.
- Choose the right de-icer: Calcium chloride for deeper cold; avoid rock salt on new slabs.
- Texture repair: If the broom finish has worn smooth, consider an overlay with grit or shot-blast + coating.
- Low spots: Map puddles after a thaw, then plan a summer grind or skim.
Safe de-icing, simplified
Good:
- CMA pellets on aluminum and wood
- Calcium chloride on mature concrete
- Small-grit traction (lab-washed sand) for immediate grip
Caution:
- Magnesium chloride on certain concretes can be aggressive over time
- Rock salt can corrode metals and damage vegetation
- “Pet-safe” blends vary—check the active ingredient
Always: Apply lightly, let chemistry work, then remove slush so it doesn’t refreeze.
Lighting & visibility matter as much as traction
Even a well-cleared ramp can feel slick in dim light. Use low-glare LED step lights or rail lights aimed at the surface. Add contrast tape at the top and bottom edges so users can judge depth and transitions, especially during snow glare.
Build a simple winter kit for the ramp
- Plastic snow shovel or pusher
- Stiff broom + floor squeegee
- Bucket of CMA or calcium chloride (per material)
- Traction mat strips and spare adhesive treads
- Microfiber towels for rails
- Portable heated mat (if power is nearby)
- Headlamp or small floodlight for early/late clearing
Store it inside, near the entry, so tools stay dry and ready.
Common mistakes to avoid
- Waiting until morning: Overnight refreeze turns slush into a sheet of ice.
- Over-salting: More pellets ≠ , more safety; excess refreezes or corrodes.
- Blocking drainage: Continuous mats with no gaps trap meltwater.
- Forgetting landings: Most slips happen at the first and last steps, not mid-ramp.
- Ignoring roof runoff: Redirect downspouts now; it’s a 30-minute fix with a season-long payoff.
When to call a pro
If your ramp ices up even after you clear it, the design may be fighting you: the slope, orientation, or surface may be wrong for your winter conditions. A professional assessment can recommend permanent traction, embedded heat, canopies, or drainage changes that reduce maintenance and improve safety every storm.
See our winter maintenance guide for more details and to plan upgrades that fit your ramp type and budget: how to keep handicap ramp from freezing.
FAQs
1) What is the safest de-icer for an aluminum ramp?
CMA (calcium magnesium acetate) is a top choice because it’s non-corrosive to metals and gentler on surrounding surfaces. Apply lightly and rinse off any residue during thawing.
2) Can I use rock salt on a wood ramp?
It’s better to avoid it. Rock salt can be harsh on fasteners and nearby landscaping. Use CMA for melting and keep sand on hand for quick traction.
3) Are heated mats worth it?
Yes, if you face frequent icing or have early-morning departures. They reduce shoveling and keep landings usable. Look for outdoor-rated, GFCI-protected models.
4) How steep is too steep for winter safety?
Gentler is safer. If you regularly fight ice, discuss a shallower slope or additional landings to break up the run and improve drainage.
5) How often should I reapply non-slip treads or coatings?
Adhesive treads may need to be refreshed each season, especially in high-traffic areas. Epoxy-aggregate coatings typically last several seasons, depending on exposure and maintenance.
Introducing Kevin Olrich, Owner of CAPS Remodeling. As a trusted expert in the field of barrier free remodeling Kevin brings a compassionate approach to create safer, more comfortable, and independent living conditions for the elderly and disabled throughout the State of Michigan. His leadership and experience is at the core of how CAPS provides the best solutions to meet the unique needs of our customers and medical professionals.


