
Understanding the Average Costs of Installing a Wheelchair Ramp in Your Home
October 8, 2025
Determining the Perfect Wheelchair Ramp Size for Your Needs: Essential Guidelines and Tips
October 22, 2025
Wheelchair ramps determine how safely you enter and move around your home; you must assess steep slopes, uneven or loose surfaces, and slippery conditions that increase the risk of falls. Check for secure anchoring, adequate width, and sturdy handrails, and ensure a non-slip surface and proper drainage. Learn “What Are the Main Safety Concerns When Using Wheelchair Ramps for My Home?” to prioritize regular maintenance and compliant installation.
Key Takeaways:
- What Are the Main Safety Concerns When Using Wheelchair Ramps for My Home? — Proper slope/length, load capacity, and adequate landings to prevent tipping and fatigue.
- Slip-resistant surface, edge protection, and handrails reduce falls and wheel drift in wet or icy conditions.
- Secure anchoring, firm transitions at doorways, and routine inspections prevent shifting, gaps, and trip hazards.
Understanding Wheelchair Ramps
Definition and Purpose of Wheelchair Ramps
You use a ramp to replace stairs where a wheelchair, scooter, or walker needs level access; ramps provide a continuous, navigable surface that minimizes transfers and manual lifting. Properly designed ramps reduce the risk of falls and strain on caregivers, support compliance with accessibility standards, and enable you to maintain independence when entering and exiting your home.
Types of Wheelchair Ramps
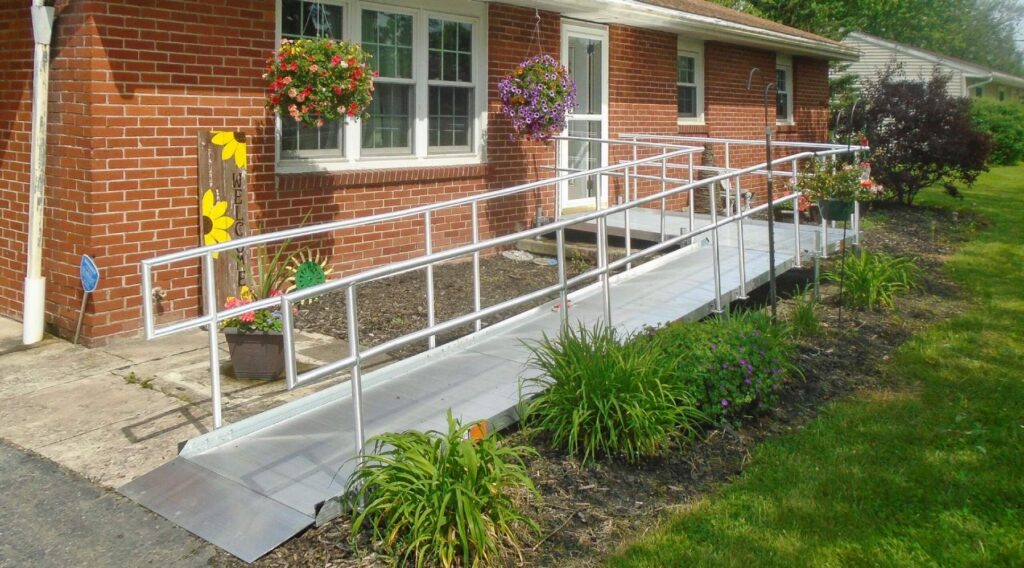
Choices include portable, threshold, modular, and permanent ramps, each differing by material, installation time, and load capacity. Slope ratios, such as the 1:12 guideline, determine the length required: a 24-inch rise necessitates approximately 24 feet of ramp for that ratio, and steeper inclines significantly increase the risk.
| Portable Ramp | Lightweight aluminum, quick setup, and often foldable; ideal for short hikes and travel. |
| Threshold Ramp | Small and low-profile for door thresholds up to 3 inches; low cost, but limited rise. |
| Modular Ramp | Prefabricated sections that bolt together for customization; durable and relocatable. |
| Permanent Ramp | Built-in materials (wood, concrete, metal); highest durability and design integration. |
| Foldable/Track Ramp | Compact storage with variable lengths, ideal for vehicles and temporary access. |
Material choices affect traction, maintenance, and noise: aluminum resists corrosion, wood can provide custom aesthetics but needs sealing, and concrete offers permanence. Calculate the ramp length from the rise using the 1:12 ratio for everyday wheelchair use; for example, a 6-inch rise requires approximately 6 feet of ramp. You should also verify the load capacity—many residential ramps support 600–800 lbs—to match the powered chair’s specifications.
- Portable ramps save space and cost but often lack handrails.
- Modular ramps offer customization and simpler permitting.
- Permanent ramps increase property value and durability.
- What Are the Main Safety Concerns When Using Wheelchair Ramps for My Home?
Benefits of Installing a Wheelchair Ramp
You gain immediate accessibility, reduced need for transfers, and faster emergency egress; ramps also lower caregiver strain and can increase property appeal to buyers seeking accessible homes. Properly installed ramps with handrails and anti-slip surfaces cut accident rates and boost daily independence.
Studies show that homes with installed ramps experience measurable improvements in mobility and a decrease in emergency calls related to falls. A well-designed ramp with a compliant 1:12 slope, secure handrails, and non-slip surfacing often significantly reduces transfer-related injuries while improving the ability to safely leave and return home independently.
Key Safety Concerns
Slippery Surfaces
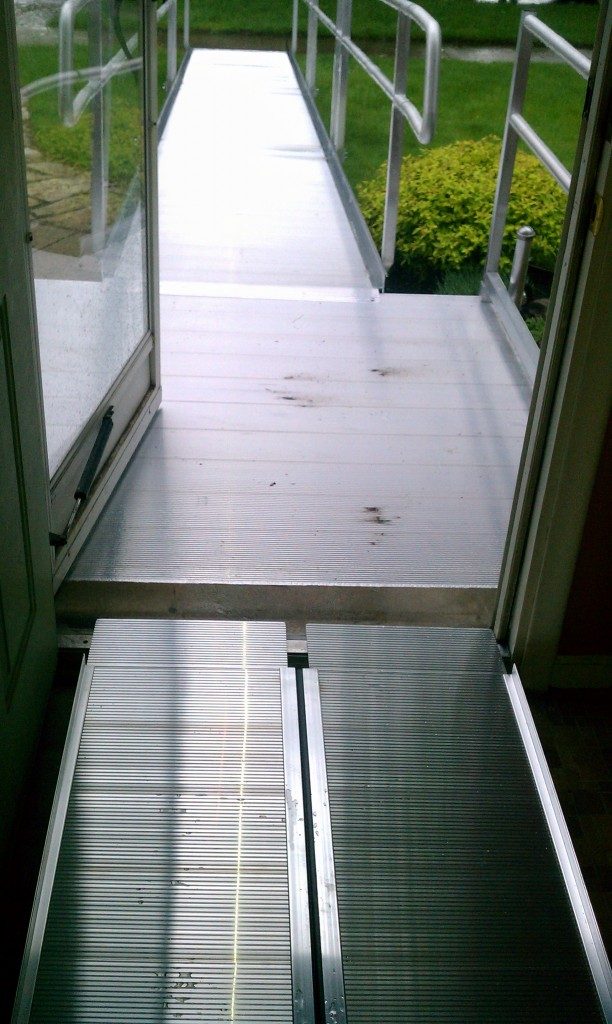
Wet metal, polished wood, and smooth concrete can turn a ramp into a hazard; textured surfaces, non-slip grit coatings, or perforated aluminum reduce the risk of skidding and improve drainage. You should expect a noticeable difference: ramps with 1/8″ grit or diamond-plate patterns cut slip incidents dramatically, especially at entry points and landings where braking and turning occur most often.
Ramp Incline and Decline
Steep slopes increase effort and tip-over danger; the ADA standard of 1:12 (8.3%)—one foot of run for every inch of rise—remains the baseline for safe residential ramps. Steeper runs require mechanical assistance or powered lifts. Short runs under 3 feet that rise often still follow the 1:12 ratio to maintain controlled propulsion and braking.
What Are the Main Safety Concerns When Using Wheelchair Ramps for My Home? Pay attention to the ADA limit of a maximum single run rise of 30 inches, which requires a level landing after that point; manufacturers also advise checking your wheelchair’s incline rating (many power chairs handle less than 10° safely). Landing dimensions, cross-slope under 2%, and handrail placement all contribute to a safe ascent and descent.
Weight Capacity and Load Distribution
Ramps must support the combined weight of the user, wheelchair, and cargo. Many modular aluminum ramps are rated for 600–800 lb, which is suitable for most power chairs and users; however, it is essential to verify the ramp’s certified load rating against your total weight. Dynamic loads from bumps or uneven surfaces increase stress compared with static weight.
Calculate capacity by adding the user’s weight, wheelchair weight, and accessories, then apply a safety factor of 1.5 to 2.0. For example, a 180 lb user + 250 lb power chair + 50 lb gear ≈ 480 lb means selecting a ramp rated ≥ 720–960 lb. Inspect mounting points and anchor spacing as well, since concentrated loads near the centerline or at transitions can exceed panel ratings.
Edge Protection and Barriers
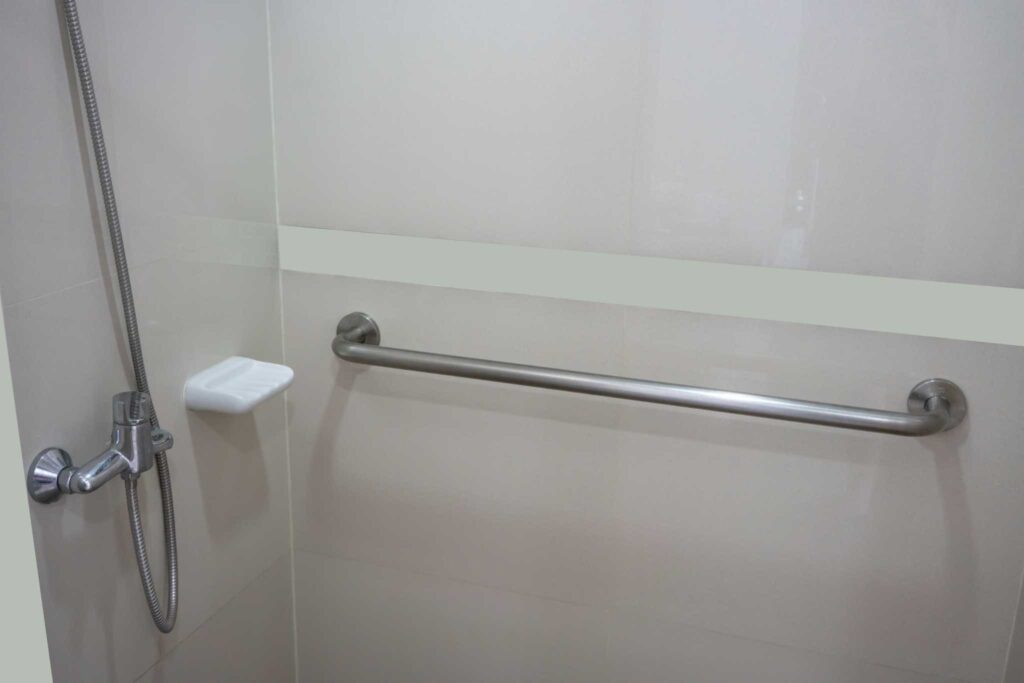
Wheels can slip off open sides; install at least a 2-inch curb or continuous rail along edges and handrails at typical heights of 34–38 inches where the rise exceeds 6 inches. Solid edge protection and visible contrast strips reduce lateral run-off and prevent small wheels from catching on gaps.
Handrails are required on ramps with a rise exceeding 6 inches. Choose closed curbs or raised edges and guardrails that resist a 200-pound lateral force at the top rail, as per common building codes. For children or those with narrow front-wheel casters, add intermediate barriers or toeboards to eliminate wheel-drop risks at transitions and landings.
Weather Considerations
Rain, ice, and snow convert good ramps into hazards; you should favor grated or textured decking that sheds water and allows traction, and plan for routine clearing. Coastal locations require corrosion-resistant materials—such as marine-grade aluminum or stainless fasteners—because salt accelerates degradation.
Consider heated ramp mats or embedded heating cables for climates with frequent ice. They may cost more, but they eliminate manual de-icing and reduce the risk of slip-related incidents. Apply UV-resistant, non-slip coatings in sunny climates and inspect anchor corrosion annually—failure from rusted connections is a common, yet preventable, safety issue.
Ramp Design and Construction
Materials Used in Ramp Construction
Aluminum, pressure-treated wood, composite decking, and concrete are the primary materials used in residential ramps; aluminum offers corrosion resistance and modular sections that support loads of 600–1,000+ lb loads, while wood is less expensive but requires sealing and is susceptible to rot, which can lead to dangerous failures. Composite boards reduce maintenance and improve slip resistance, while concrete offers permanence but comes at a higher cost and requires longer installation times. Choose materials based on climate, maintenance you can handle, and the expected load and traffic patterns for your ramp.
Importance of Proper Measurements
Slope and clearances dictate safety: a 1:12 rise-to-run ratio is the ADA benchmark (1 inch rise per 12 inches of run), landings are required every 30 inches of vertical rise, and a recommended minimum clear width is 36 inches (42 inches or more is better for two-way traffic). Incorrect measurements create excessive effort, tipping risk, and noncompliance — answer the question “What Are the Main Safety Concerns When Using Wheelchair Ramps for My Home?” by starting with accurate dimensions.
Measure vertical rise from finished ground to threshold, then multiply by 12 to get ramp length (example: 24″ rise → 24 ft ramp at 1:12). Factor in landing sizes (typically 60″ long by 60″ wide for turning room), door swing, and handrail height (34–38 inches). Verify edge protection, clear headroom, and that intermediate landings occur before every 30″ of rise to prevent fatigue and uncontrolled descent.
Compliance with Local Building Codes
Local codes often diverge from ADA standards for private homes; many jurisdictions require permits, structural plans, and inspections to ensure compliance with these standards. Failing to obtain approvals can result in fines, forced removal, and insurance denials. Check zoning setbacks, guardrail rules for drops exceeding 30 inches, and any HOA requirements before construction to ensure your ramp meets both safety and legal expectations.
Search your municipal building department or online code portal for specific load requirements (typically related to residential live loads) and the necessary documentation, including site plans, anchorage details, and structural calculations. Expect inspectors to verify footings, anchorage, slope, handrails, and surface slip resistance. In cities like Los Angeles or Chicago, permits are routinely required for ramps. To avoid delays, bring stamped drawings or hire a professional.
The Role of Professional Installation
Experienced installers perform site surveys, precise measurements, and structural calculations, and obtain the necessary permits; hiring a licensed installer reduces the risk of construction errors and structural failure. Prefab aluminum kits can be installed quickly by a contractor, while custom wood or concrete ramps benefit from professional design to ensure durability and safety.
Contractors provide stamped plans, coordinate inspections, recommend materials suitable for local weather conditions, and offer warranties. Typical costs vary: prefab aluminum ramps often range from $1,000 to $5,000, custom wood ramps from $500 to $3,000, and concrete ramps from $3,000 to $10,000, depending on the length and complexity of the project. Request references, proof of insurance, and examples of prior work to confirm competence and compliance.
Maintenance and Inspection
Routine Maintenance Practices
You should conduct a quick visual check every month and a more thorough inspection every three months. During these inspections, tighten loose bolts, sweep away debris, wash grime off non-slip surfaces, lubricate hinges, and touch up sealant or paint as needed. Pay special attention to loose fasteners and slippery surfaces, since those are common contributors to accidents. Many residential ramps carry ratings of 600–1,000 lb, so keeping the hardware tight preserves the rated capacity and ensures safe use.
Signs of Wear and Tear to Look For
Inspect for rot in wooden ramps (soft spots when probed), rust or corrosion around bolts and welds on metal ramps, cracked or splintered boards, warped sections, and peeling or worn non‑slip coatings. Look for gaps or movement at connection points—anything that allows more than a hairline shift under pressure can signal a structural problem. Check the landing and handrails for looseness or tilt.
Probe suspect wood with a screwdriver to find hidden decay, shine a flashlight on weld seams to spot hairline cracks, and feel for play at each joint; any wobble or bounce under a wheelchair or your weight warrants immediate repair. Measure gaps at transitions—if gaps exceed practical thresholds for your tires or footrests, install threshold plates or replace the segment to eliminate entrapment hazards.
Seasonal Adjustments and Preparations
Schedule seasonal work: apply or renew outdoor-grade non-slip coatings in the autumn, remove snow and ice within 24–48 hours of accumulation, and avoid using rock salt on aluminum ramps, as it accelerates corrosion. Store removable ramp sections indoors during heavy winter if possible. Check drainage around ramp footings each spring to prevent frost heave and settling that can change the slope.
Use sand or calcium‑based de‑icers instead of sodium chloride on metal surfaces, and protect wooden ramps with a penetrating water repellent before freeze‑thaw cycles begin. After storms, inspect anchor bolts and footings for movement. Even a 1/2-inch settlement at one end of a ramp can alter its angle enough to affect usability and safety.
Importance of Regular Inspections
Regular inspections reduce the chance of sudden failures by catching small problems early. Perform a visual review monthly, a hands-on check quarterly, and after any storm or heavy load event. Ask yourself, “What are the Main Safety Concerns When Using Wheelchair Ramps for My Home?”—focus on loose anchors, uneven surfaces, and degraded traction as top risks to address.
Keep a dated inspection log with photos and notes on repairs; that record speeds diagnosis and helps professionals prioritize work. For heavy daily use or motorized chairs, schedule a professional inspection every 1–2 years to verify structural connections, load capacity, and compliance with recommended slope (typically 1:12 for accessibility ramps).
Accessibility and User Comfort
Slope and Width Specifications
Follow ADA’s 1:12 guideline: 1 inch of rise per 12 inches of run, so a 30‑inch rise needs about a 30‑foot ramp; keep the clear width at least 36 inches and provide 60‑inch landings for turns or passing. Steeper slopes increase braking distance and tip‑over risk for manual and power chairs. If you ask “What are the Main Safety Concerns When Using Wheelchair Ramps for My Home?”, slope and width are among the top technical factors.
Grip and Traction Features
Specify non-slip surfaces, like coarse‑grit aluminum, abrasive strips, or rubberized mats, that maintain traction when wet and on inclines exceeding 5°. Closed surfaces prevent toe entrapment, a common issue with grated decks. You should clear debris, apply anti‑slip epoxy with silica aggregate, and avoid smooth paint finishes that become slick with rain or snow. Slip risk is a leading cause of ramp incidents.
Match materials to climate: in snowy regions, consider heated ramp mats or open-grate aluminum for shedding snow, plus a non-skid overlay to preserve rollability. Coastal sites need anodized finishes and stainless fasteners to resist salt corrosion. You can test traction by rolling a chair over the surface under load and replacing abrasive strips when grit visibly wears down—aim to replace before performance drops below safe levels to prevent wheel slippage.
Visibility and Lighting Issues
Use high-contrast nosing, reflective tape, and fixed lighting to ensure edges and landings remain visible at dusk and night. Aim for fixtures that deliver roughly 300–500 lumens per ramp segment and consider adding motion sensors or battery backup to prevent dark gaps. Contrast markings in yellow or white help users with low vision and reduce the likelihood of missteps.
Minimize shadows by spacing shielded LEDs evenly and installing lights at landings and midway on long runs; combine illuminated fixtures with photoluminescent or tactile edge strips to mark transitions. You should test lighting from a seated eye height (approximately 48–52 inches) at night and consider adding solar or backup power in areas prone to outages, so edges never disappear when you need them most.
Planning for Emergency Situations
Clear Pathways and Accessibility
Maintain a continuous, obstruction-free route at least 36 inches wide, with 60-inch clear landings for turns. Secure loose rugs, stow cords, and keep thresholds flush with the floor. Remove snow and ice within 30 minutes after accumulation and apply grit or salt. Install battery-backed lighting along the route and mark edges with high-contrast tape. These measures address the main safety concerns when using wheelchair ramps in your home.
Emergency Protocols for Wheelchair Users
Create a written evacuation plan that lists two exit routes, a designated meeting point, emergency contacts, and a laminated card with your wheelchair’s model, weight, and battery type. Keep a 72-hour medication kit, rehearse transfer procedures, and notify the local fire/rescue department of your needs. Conduct evacuation drills at least twice a year and designate neighbors or caregivers who are trained to assist during power outages or smoke events.
Stock an evacuation kit that includes a charged spare battery or portable power pack (many chairs use 12V batteries), a lightweight manual wheelchair or transfer board, a transfer belt, and a printed medication list. Aim for a spare battery that gives at least 2 hours of mobility for emergency exits; verify runtimes—typical power chairs run 8–12 hours under normal use. Register your plan with community emergency services and keep copies of key documents accessible.
Backup Options in Case of Ramp Failure
Keep at least one portable folding ramp (aluminum, rated 600–800 lbs) and a manual wheelchair stored near the entry for rapid deployment. Arrange a neighbor or caregiver agreement for emergency assistance and train them on safe transfer techniques and ramp placement. Mark an alternate accessible entrance and ensure first responders can access it.
Portable ramps should match your required run. For a 12-inch rise, a 12-foot, 1:12 ramp is ideal. For small thresholds, use 1– to 2–inch slope threshold ramps. Consider an evacuation chair for multi-step egress—verify weight capacity and practice deployment annually. Maintain a service contract for your permanent ramp and test any portable solutions under load before an emergency to confirm secure anchoring and clearance.
To wrap up
Summing up, if you ask “What Are the Main Safety Concerns When Using Wheelchair Ramps for My Home?” focus on slope, surface traction, handrails, weight capacity, secure transitions, weather protection, and regular inspections; addressing these factors helps you prevent falls, tipping, and structural failures and ensures your ramp complies with standards and meets your mobility needs.
FAQ
Q: What Are the Main Safety Concerns When Using Wheelchair Ramps for My Home?
A: The primary concerns are ramp slope and run (steepness), surface traction (slip resistance), secure anchoring and structural capacity, proper edge protection and handrails, safe transitions/landings and adequate width, and ongoing maintenance for weather and wear. Each factor affects stability, ease of use, and risk of tipping or slipping, so they should be evaluated together when choosing or installing a ramp.
Q: What slope and width should a home ramp have to be safe?
A: Aim for a 1:12 slope (1 inch rise per 12 inches run) for independent manual wheelchair use; gentler slopes (1:16–1:20) are safer when possible. Limit any single run rise to about 30 inches before adding a level landing. Minimum clear width is 36 inches; 48 inches is more comfortable and safer for powered chairs and caregivers. Follow these guidelines to minimize effort and reduce tipping risk.
Q: How do I ensure the ramp surface and edges are slip-resistant and safe in bad weather?
A: Use textured or perforated surfaces (e.g., non-slip aluminum, roughened concrete) and add non-slip strips or coatings. Provide raised-edge protection or curbs (typically at least 2 inches) to prevent wheels from rolling off the edge. Design drainage or slopes to prevent standing water, and plan for snow/ice removal and anti-slip treatments during winter.
Q: What structural and load-capacity checks are important before using or installing a ramp?
A: Verify the ramp’s rated load exceeds the combined weight of the user and mobility device (power chairs can weigh 300–600+ lbs). Ensure secure anchoring to the house or ground and check for corrosion, loose fasteners, or sagging. Use handrails on both sides at a height of approximately 34–38 inches with proper mounting. Confirm that the ramp material and supports comply with local building codes or the manufacturer’s specifications.
Q: What landing, transition, lighting, and maintenance features improve ramp safety?
A: Provide level landings at top and bottom (and after runs over 30 inches rise); landings should be at least as wide as the ramp and typically 60 inches long where space allows. Smooth, low-threshold transitions or beveled edges under 1/2 inch reduce snag and jolt hazards. Install good lighting, edge/step contrast markings, and reflective tape for night use. Perform regular inspections for wear, loose hardware, surface damage, and clear debris promptly. Also, clear snow and ice from the area.
Introducing Kevin Olrich, Owner of CAPS Remodeling. As a trusted expert in the field of barrier free remodeling Kevin brings a compassionate approach to create safer, more comfortable, and independent living conditions for the elderly and disabled throughout the State of Michigan. His leadership and experience is at the core of how CAPS provides the best solutions to meet the unique needs of our customers and medical professionals.


