
Home Lifts vs. Traditional Home Elevators: What You Need to Know
August 12, 2025
When to Combine Stair Lift and Home Elevator Solutions in Your Home
August 26, 2025
With outdoor chair lifts exposed to rain, snow, and sun, you must prioritize weatherproofing and safety when selecting, installing, and maintaining them; ensure seals, corrosion-resistant finishes, and covered controls to prevent corrosion, electrical faults, and slips, and schedule regular inspections so your lift delivers reliable operation and extended lifespan. Work with qualified installers, follow local codes, and consult https://www.capsremodeling.com/ for professional guidance to keep your stairs safe and usable year-round.
Key Takeaways:
- Choose weatherproof materials and protective measures: select stainless or galvanized fasteners, powder-coated or marine-grade finishes, sealed motor enclosures, and UV-resistant covers; site the track to avoid standing water and provide drainage to limit corrosion and electrical exposure.
- Prioritize safety features and seasonal maintenance: use slip-resistant seats and landing surfaces, secure wind restraints and limit switches, install GFCI-protected outdoor wiring, and adopt a winter routine (timely snow/ice removal, compatible de-icers, battery checks) to keep the lift operational and safe.
- Plan with professionals for code compliance and longevity: have a qualified contractor assess structural loads, local wind/snow factors, and permit requirements, follow manufacturer service schedules, and consult CAPS Remodeling for installation, inspection, and maintenance at https://www.capsremodeling.com/.
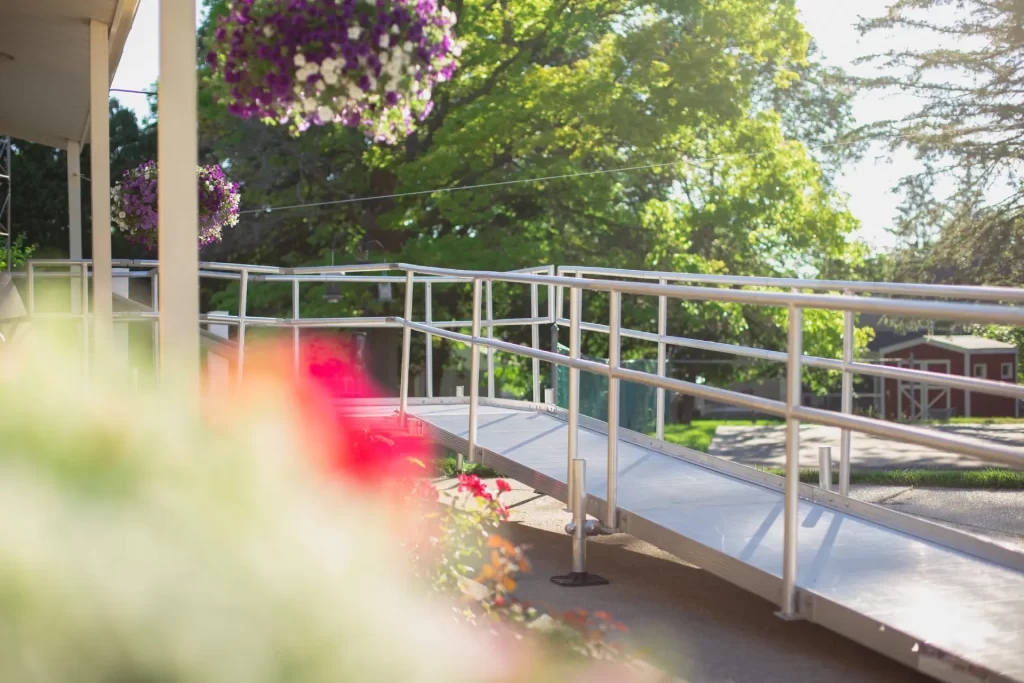
Beyond Mobility: The Importance of Outdoor Chair Lifts
Enhancing Accessibility for All Ages
Across generations, you can transform stairs from a barrier into a bridge: about 1 in 4 U.S. adults report some form of disability, and aging households increasingly need solutions that let grandparents and kids participate equally in outdoor life. Outdoor chair lifts with 300–400 lb weight capacities and easy-to-use controls let you keep family routines—gardening, grilling, or supervising pool time—without lifting or carrying, preserving independence and reducing caregiver strain.
Expanding Outdoor Living Spaces
By adding a properly specified lift, you open patios, decks, and terraces to daily use rather than occasional access; many outdoor lifts feature IP54-style weatherproofing, locking swivel seats, and integrated seat belts so you can confidently use exterior stairs year-round. That accessibility turns underused areas into a functional living space for entertaining, relaxing, or caregiving.
At CAPS Remodeling, projects installing outdoor chair lifts often unlock measurable lifestyle gains: a typical straight outdoor model can be installed in 1–2 days. At the same time, curved rails may take longer but still usually finish within a week. Expect price ranges roughly between $4,000–$15,000, depending on rail complexity and weatherproof options; clients frequently report increased daily use of decks and yards, plus improved resale appeal. Safety add-ons like weather covers, battery backups, and remote locks ensure you maintain access during storms or power outages while keeping slip and fall risks minimized for family and guests.
Choosing the Right Outdoor Chair Lift: Key Features to Consider
- Rail type — straight, curved, or customized rails — determines fit and cost; curved rails often add 20–50% to the price and require on-site templating.
- Material & weatherproofing — stainless steel, powder-coated aluminum, and sealed motors resist corrosion; look for IP-rated components for rain and salt exposure.
- Weight capacity — models commonly range from 300–600 lb; select capacity with at least a 20–30% safety margin for mobility devices.
- Seat design & restraints — foldable seats, swivel bases, and a reliable seatbelt or harness improve transfer safety on wet landings.
- Safety features — obstruction sensors, overspeed governors, and automatic braking — reduce fall risk. Wet or icy tracks demand sensors calibrated for outdoor use.
- Power source — mains with battery backup preferred outdoors; evaluate cycle counts (10–20 backup trips typical) and charging behavior.
- Controls & accessibility — keyed controls, remote call/send, and intuitive ergonomics help caregivers and independent users alike.
- Installation type — surface-mounted rails vs. wall-mounted brackets affect stair footprint; check for invasive drilling into historic or preserved structures.
- Maintenance & serviceability — modular components, accessible motors, and local technician support speed repairs and reduce downtime.
- Certifications & warranty — look for compliance with ANSI/ASME or local standards and warranties covering outdoor use and electronic components.
Weight Capacity and User Specifications
Assess the individual using the lift and any mobility aids: many outdoor chair lifts offer capacities of 300–600 lb, with bariatric models rated higher. Choose a unit that gives you a 20–30% margin for the user’s weight to account for clothing, assistive devices, or assisted transfers, and confirm the seat width and armrest to match the user’s transfer needs.
Size and Space Requirements for Installation
Evaluate the stair width, headroom, and landing depth: a straight outdoor rail typically needs at least 30–36 inches clear width, and top/bottom landings should allow a minimum of 24 inches for safe parking and transfer. Verify door swings, handrail relocation, and any landscape features that could obstruct the rail.
Detailed planning should include stair geometry: measure total rise and run (average rise per step ~7 inches, run ~10–11 inches) so the rail length and pitch match exactly. Curved or intermediate landings require a custom rail template; those projects commonly add 2–6 weeks and can increase cost by $2,000–$4,000. Check for adequate foundation where brackets mount—soft soil or hollow steps may need concrete footings or reinforcement. For coastal or freeze/thaw climates, allow additional clearance for anti-icing systems and protective covers so rain, salt spray, and freezing won’t block the carriage or sensors. For professional measurement and permit handling, contact Caps Remodeling at https://www.capsremodeling.com/ to schedule an on-site assessment and build plan.
Power Source: Electric vs. Manual Systems
Most outdoor chair lifts use mains-powered drives with integrated battery backup so you can operate during outages; manual-wind backups exist but are uncommon outdoors. Check that the electrical feed is GFCI-protected and that the control system has weatherproof enclosures rated for outdoor installation.
Typical installations use a 110–120V supply feeding a sealed motor and charger; backup batteries (sealed lead-acid or lithium) normally provide 10–20 trips when mains fail, with charging while parked. Lithium batteries tolerate lower temperatures and longer cycle life, but cost more upfront. Emergency manual overrides work for single rescues but are slow and require trained attendants. Have your installer specify outdoor-rated wiring, conduit, and a dedicated circuit with GFCI protection to reduce the risk of electrocution and corrosion; routine battery checks every 6–12 months keep the system reliable.
You can request a site assessment and custom quote at https://www.capsremodeling.com/.
Weatherproofing Strategies: Protecting Your Investment
Protective Coatings and Finishes
Select coatings designed for outdoor mechanical equipment: powder-coating at 60–80 µm for frames, hot-dip galvanizing for steel rails, and 316 stainless fasteners in salt-air locations. Use a zinc-rich primer under paint for cut edges and touch-up chips every 2–5 years, depending on exposure. UV-stable topcoats and acrylic enamel finishes can reduce fading and cracking—your installer should match finish systems to local climate and lifecycle goals.
Enclosures and Covers: When and How to Use Them
Hard enclosures (powder-coated aluminum cabinets) offer IP66-level protection and last far longer than soft covers in windy sites; soft, UV-stabilized 600D vinyl covers work for seasonal protection. Ensure you never operate the lift while a cover blocks movement or emergency access—operating under a cover can trap heat and disable safety sensors. Design enclosures with ventilation and access panels so you can inspect controls without full removal.
For long-term protection, pair a watertight enclosure with passive or active moisture control: install a thermostatic heater or small fan plus a desiccant pack to keep relative humidity below 60%, preventing corrosion and electrical faults. Use continuous neoprene gaskets, sloped roofs (5–10°) to shed runoff, and stainless-steel hinges and fasteners; in coastal installs, specify 316-grade stainless and silicone seals. Anchor enclosures to resist local wind loads and provide lockable access for maintenance. If you need help specifying materials or an installer, CAPS Remodeling can assess site exposure and recommend an enclosure design matched to your IP rating and local weather conditions.
Safety First: Essential Safety Features in Outdoor Chair Lifts
Emergency Braking and Stopping Mechanisms
Manufacturers typically combine an electromechanical brake with an overspeed governor and a mechanical fail-safe so the lift will hold and stop under full rated load (commonly 300–350 lb). Emergency-stop buttons within arm’s reach cut power instantly, while battery backup lets you complete several controlled trips during outages (many systems provide about 5–10 cycles). Look for systems designed to meet industry standards such as ASME A18.1 and that limit travel after activation to a very short distance, minimizing the risk of a fall.
User Safety Harnesses and Secure Seatbelt Designs
Choose a restraint system that matches the user: retractable lap belts, 3‑point harnesses, and quick-release buckles are common, with webbing and anchors rated well above typical loads (manufacturers often spec webbing tensile strength > 1,000 lb and seat ratings of 300–350 lb). Corrosion-resistant hardware and UV-stable webbing prevent degradation outdoors, and automatic locking seats or swivel locks reduce danger during transfers by keeping the occupant immobile until you confirm secure positioning.
For retrofit or new installations, you should verify belt placement and clearance: lap belts should sit low across the pelvis, not the abdomen, and 3‑point harnesses need a fixed shoulder anchor at a stable frame point to limit forward torso excursion. Inspect webbing monthly for frays, replace after significant UV exposure or visible wear, and schedule professional testing annually—anchor bolts and quick-release mechanisms can weaken from freeze–thaw cycles or salt spray. Opting for marine‑grade stainless hardware and replaceable belt modules improves long‑term safety and simplifies maintenance for outdoor applications.
Long-Term Maintenance: Keeping Your Chair Lift in Optimal Condition
Regular Inspections and Service Checks
Schedule a quick visual inspection every month and a full professional service at least once a year; technicians typically perform belt tension checks, track alignment, and an electronic diagnostics scan in 60–90 minutes. You should tighten loose fasteners, replace frayed cables immediately, and note any grinding or slipping sounds—these often indicate mechanical wear or a failing drive. Test the battery backup under load every six months to confirm safe evacuation capability.
Cleaning and Care Tips for All Weather Conditions
Rinse salt and debris off the rail after coastal storms and wipe electronics dry within 24 hours to prevent corrosion and short circuits; avoid pressure washers and use a mild detergent with a soft cloth. Lubricate the track with manufacturer-approved grease every 3–6 months, and cover exposed units with a breathable, weatherproof cover when not in use. Keep controls clear of ice and snow to protect safety sensors.
- Outdoor chair lift — inspect mounting points and rail for rust or loosening after heavy weather.
- Weatherproof measures — seals, gaskets, and covers extend component life, especially near salt air.
- Maintenance schedule — log monthly visual checks and annual professional services to track wear.
- Recognizing early rust or frayed cabling lets you replace parts before a safety hazard develops.
For deeper protection, flush drainage holes and vents twice per year and apply a corrosion inhibitor to exposed metal; in cold climates, install a heated cover or de-icing strip to prevent rail freeze that can jam the carriage and strain the motor. Lift’s rechargeable battery requires recharging every 3–5 years, depending on the number of cycles, and a simulated power outage test is run quarterly to verify battery backup performance. Keep a service log with dates, parts replaced, and a photo of any wear so you and your technician can spot trends and prioritize repairs.
- Safety checks — verify seatbelt function, limit switches, and emergency stop response during each service.
- Track lubrication — use only manufacturer-recommended lubricants to avoid attracting grit that accelerates wear.
- Battery maintenance — test under load every six months and replace according to the manufacturer’s 3–5 year guideline.
- Recognizing subtle changes in noise, speed, or vibration can save you from unexpected failures and costly emergency repairs.
Navigating Regulations: Understanding Local Installation Codes
Compliance with Accessibility Standards
Public installations generally must meet the ADA and ICC A117.1 accessibility guidelines, while many jurisdictions adopt ASME A18.1 for stairway chairlifts and platform lifts. You should verify clearances—accessible routes typically require a 36-inch minimum width—and confirm seat, armrest, and restraint dimensions in manufacturer specs to align with local code adoption. Private homes may have more flexible requirements, but referencing these standards helps avoid surprises during permitting and inspection.
Permits and Inspections: What You Need to Know
Many municipalities classify outdoor chair lifts as mechanical equipment, so you can expect a mechanical permit and often an electrical permit if the unit ties into mains power. Inspections typically encompass structural anchoring, weatherproof electrical connections, and final operation testing. It is recommended to plan for site visits by building and electrical inspectors before final sign-off. Work by licensed contractors typically speeds approval.
Permit timelines commonly range from a few days to 3 weeks, depending on workload and whether engineered drawings or load calculations are required. Typical permit fees run from about $50–$500, though larger projects or commercial sites cost more. You should submit the installation diagram, anchoring details, and manufacturer safety data with your application; inspectors will check anchor bolt spacing, rail alignment, emergency-stop function, and outdoor wiring protection. Outdoor circuits must meet NEC requirements—expect GFCI protection for external outlets and weatherproof junction boxes—and hiring a licensed electrician reduces re-inspection risk. Failure to obtain permits can lead to fines, forced removal, or voided insurance coverage, while proper permitting often speeds resale and avoids compliance headaches.
Real-Life Applications: Success Stories from Users
Transformative Experiences: User Testimonials
You hear from homeowners who report dramatic changes: a 78-year-old client regained daily access to a riverside patio after CAPS installed an outdoor lift, cutting stair-related incidents from three per year to zero in 14 months. The installation included a powder-coated track and stainless fasteners to resist salt air, and the user cited the lift’s obstruction sensors and seatbelt as key to feeling safe again.
Community Impact: How Chair Lifts Enhance Outdoor Spaces for Everyone
Neighborhood centers that added weatherproof chair lifts saw measurable gains: one community increased senior program attendance by 22% within six months after installing two ADA-compliant outdoor lifts in 2022, giving you clear evidence that improved access drives participation and social inclusion.
You should weigh lifecycle costs and benefits: typical outdoor lift installations run about $8,000–$12,000 per unit, depending on track length and site prep, but grants and local accessibility funds often cover a portion. Regular service—an annual inspection and basic cleaning every 3–6 months—keeps components like the motor (often backed by a 5-year limited warranty) and the track (many manufacturers offer a 10-year warranty) performing. Look for weatherproof specs such as IP54–IP66 ratings, powder-coated steel, stainless hardware, heated controls for freezing climates, and battery backup that typically supplies ~40–60 emergency cycles after power loss; these features reduce the risk of corrosion or failure in harsh outdoor environments while maximizing uptime for your community.
Final Words
Following this, you can ensure your outdoor chair lift performs reliably by choosing weatherproof materials, sealed electronics, and corrosion-resistant fasteners, and by scheduling routine inspections and cleaning to prevent debris and ice buildup. You should also confirm proper drainage, secure rail anchoring, and professional installation to meet safety codes. For expert assessment and service, consult CAPS Remodeling at https://www.capsremodeling.com/.
FAQ
Q: What weatherproofing features should I look for when selecting an outdoor chair lift for stairs?
A: Choose components and finishes designed to withstand moisture, UV, freeze/thaw cycle, and salt exposure. Key features include stainless-steel (316 grade preferred) or powder-coated aluminum frames, sealed motors and gearboxes with an IP rating (IP54 or higher recommended for outdoor use), and corrosion-resistant fasteners and bearings. Look for seats and controls with UV- and water-resistant materials, and wiring harnesses with outdoor-rated insulation and watertight connectors. Drainage and mounting design matter too: the track or rail should allow water to run off rather than pond, and mounting points should not trap moisture against wood or metal. Consider a breathable, waterproof cover or a lockable shelter for the seat and electronics when the lift is not in use, and plan a sheltered location for batteries and the controller if possible. For professional selection and weatherproofing upgrades tailored to your stair layout, contact CAPS Remodeling at https://www.capsremodeling.com/.
Q: How should I operate and protect an outdoor chair lift during winter, heavy rain, or icy conditions to maintain safety?
A: Modify operation and maintenance to the season: clear snow and ice from the stairs and rail before using the lift, and avoid operation if ice is present on the rail or tread surfaces. Use a non-corrosive de-icer (avoid high-concentration salts that speed corrosion) and sweep or brush off accumulated snow; a thin layer of grit or anti-slip tape applied to steps can improve traction. Store removable seat cushions and electronic remotes indoors during storms and when prolonged bad weather is forecast. If the unit has a battery, keep it charged and, if your model allows, move the battery to a warmer location in extreme cold to preserve capacity and longevity. Many outdoor lifts include obstruction sensors and automatic stop features—confirm these are functional before each use. If you anticipate frequent winter use in a region with heavy snow, ask about heated rail options, heated enclosures for controls, or professional winterization packages from an installer such as CAPS Remodeling (https://www.capsremodeling.com/).
Q: What installation and ongoing maintenance practices improve safety and code compliance for outdoor stair chair lifts?
A: Proper installation and regular inspection are vital for safe, long-term operation. Have the lift installed by a licensed professional who understands local building codes, load ratings, and anchoring requirements—improper anchoring can lead to shifting or failure during use. After installation, perform routine checks: weekly visual inspection for loose bolts, corrosion, worn wiring, or damage; monthly operation tests of safety stops, sensors, seat belts, and the emergency stop; and an annual professional service that includes lubrication with manufacturer-approved products, electrical checks, and load testing. Keep a log of inspections and repairs, and replace worn parts with manufacturer-approved components. Verify that the lift’s rated capacity matches the expected users and that any modifications (rails, landings, ramps) are reviewed by the installer. For help with compliant installation, periodic service plans, and parts replacement, reach out to CAPS Remodeling at https://www.capsremodeling.com/.
Introducing Kevin Olrich, Owner of CAPS Remodeling. As a trusted expert in the field of barrier free remodeling Kevin brings a compassionate approach to create safer, more comfortable, and independent living conditions for the elderly and disabled throughout the State of Michigan. His leadership and experience is at the core of how CAPS provides the best solutions to meet the unique needs of our customers and medical professionals.


